
Setup and Configure
This section will discuss the setup and configuration for the DAQ card and software so that everything works properly without any errors. These steps must be followed every time the card and software are used. A print friendly version of this page is available here Setup and Configure.pdf .
Due to a problem in the software, there is a recurring bug in the configuration menu. To properly setup and configure the card and to overcome this issue, please to go Error -1073807343 (Device Not Present) in the Troubleshooting section. Then continue to follow the steps below.
Please read the Troubleshooting section because there are known to be a few errors that come up if not specially treated.
- To setup the DAQ card to make sure everything is properly configured. Click on TeraTerm. A window will pop up similar to the image below:
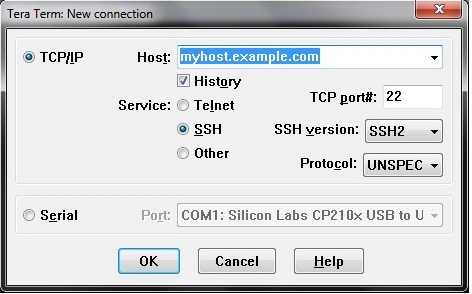
- Select the “Serial” option and then click on “Port”. The COM# will be different depending on the configuration of your PC.
It will sometimes change depending on what USB port the card is plugged into or by manually changing the properties of the card (this will be discussed at a later time for configuring the card to work with the software).
Make sure that Silicon Labs CP210x USB to UART Bridge is selected.
Keep in mind what COM the card is connected to because this will be used later to setting up a scan. Then click “OK”.
- After that, go to “Setup” and select “Serial port”. Make sure that the serial port setup is identical to the images on below for the baud rate, data, parity, stop and flow control.
Once this is done click “OK”.
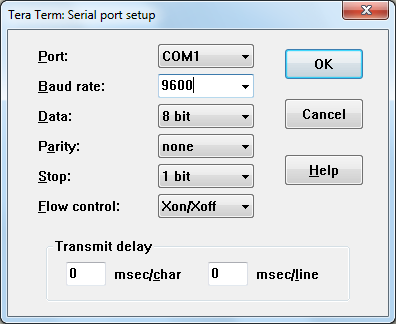
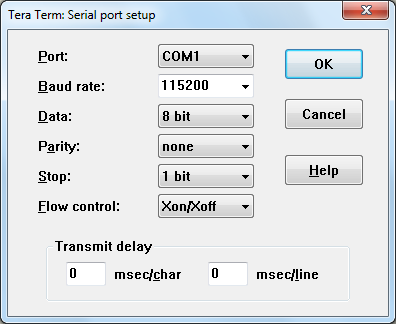 (Images for the serial port setup, Left – Old DAQ card; Right – New DAQ card)
- These past steps just configured the card so that the computer can properly interact with it.
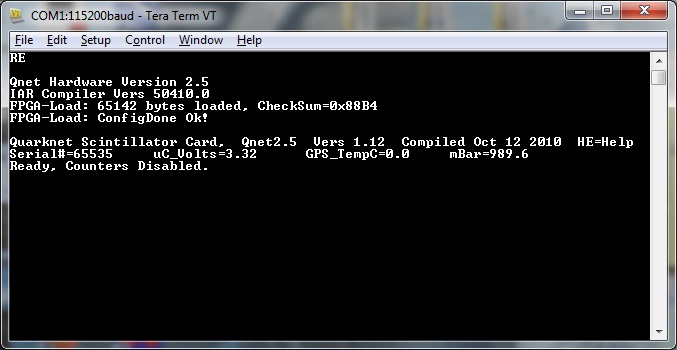
Regarding the new DAQ card, one can make sure everything is properly configured. To do this, TeraTerm still open, type RE (reset everything) in the command terminal.
If you are not allowed to type anything in the terminal then something was missed in the setup. Please start at the beginning and try again.
Once RE is typed in the terminal, two things will happen. The DAQ card will flash its LEDs and the terminal should look like the image below.
If these two things happen, then everything is correctly setup and the card is ready for scans.
- With the card properly communicating with the PC, start up the CROP software. Depending on which version you are using, there are a few extra steps.
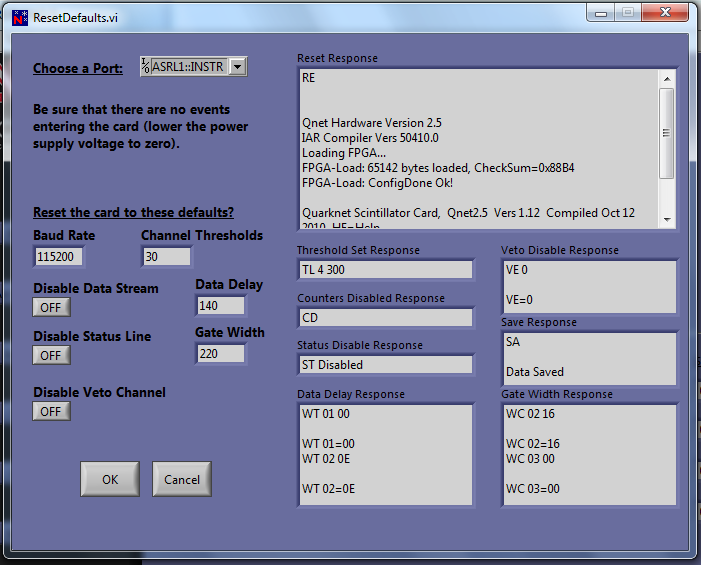
In version 5.0, the software allows you to reset the card and make sure that the card is properly communicating with the software and PC. To do this, run the “Reset Card Defaults” mini program by selecting it in the “Tools” menu in the CROP DAQ program.
Then select the port that the DAQ card is connected to (this tends to lag a bit so please wait patiently). Simply click “OK” and wait for responses. The responses should look like the image below. Click the “X” to close the mini program.
If it does NOT look like the responses below, then “hard reset” the card by unplugging and plugging back in. Try it again.
- Once resetting the card is done for the new DAQ card only; continue on to configure the card for both new and old by selecting “Configuration” in the “Tools” menu.
This is where remembering what COM the card is connected to is important. Select the COM# that the card is connected to and then click “OK”.
Images of the configuration menu are shown on below.
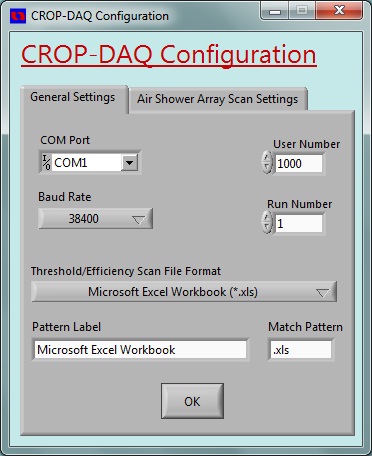
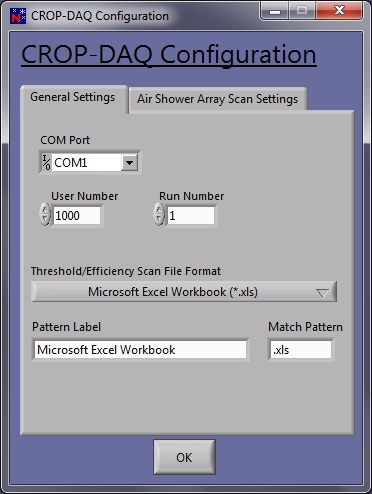 (Images for the Configuration menu, Left – Old DAQ card; Right – New DAQ card)
- This is also a perfect time to input your User Number so that when doing specific scans such as the Array Shower Scan the number will be included in the stored data.
- After following these past steps, the card is officially ready to do a scan!
Please read the Troubleshooting section because there are known to be a few errors that come up if not specially treated.